
Adding a QuickIR Response
This topic explains how to add a QuickIR response to a standard information request (IR).
About this task
Note: Only a company user with the Leader user role can view and access
QuickIR. State agency users do not have access to
QuickIR or your company’s prepared responses in the feature. Agencies
cannot access QuickIR or the prepared responses stored in your
repository.
Procedure
-
>Click QuickIR.

-
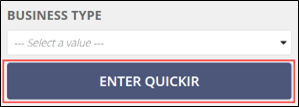
Select your Business Type.
Note: If you are associated to multiple companies in SES, you muse select the desired company, as well.
-
Click Enter QuickIR.
 Note: The default view in QuickIR is the Response Added section. This view displays the standard IRs for the Business Type selected that have responses saved by your company. Alternate views available include No Response Added, which displays IRs with no responses added by the company, and Expired Responses. As you learn when saving responses, an expiration date must be applied. The Expired Responses view allows for easy tracking of IRs requiring an update. You can update your selected Business Type from any view at the top of the page.
-
Click No Response Added.
Note: This is where you can review the standard IRs in SES.
-
Click Show Filters to filter the IRs by the Area for
Review or IR Text.

-
Select the IRts to which you would like to add a response by clicking on the
Library ID hyperlink.

-
Click Add QuickIR.

- Upload your response.
-
Select a desired expiration date.
- 6 months
- 1 year
- 2 years
Note: SES pre-determines expiration options. You cannot set a custom expiration time for a response. Expired responses can no longer be associated to IRs as part of an examination. -
Click ADD QUICKIR.
 Note: If a standard IR to whicy you have added a QuickIR response is modified, you are sent a notification. You are also notified if a standard IR to which you have added a QuickIR response is retired.Note: You can update a QuickIR response, if needed, before sending it to the agency: see Updating a QuickIR Response.